 |
| Personal Style |
As you may know, I am taking some online classes in fashion with the Paraons x Teen Vogue program. Many of my assignments require me to do an interesting project and then blog about the process and what I learned!
I will keep adding to this page as the course goes on, so check back if you're interested to see what I am doing and learning.
If you are interested in taking this course yourself use my referral for $50 off your tuition! Click the link.
If you are interested in taking this course yourself use my referral for $50 off your tuition! Click the link.
Production Costs
The first assignment has to do with production cost. I previously designed and created an accessory out of unconventional household materials, in this case cardboard, tinfoil, paper, and fabric scraps to create a bag. My inspiration came from this close up image of an earring which creates a perfectly round shape with a blurred oval print. It brought to mind the circle bags I've been seeing everywhere lately (like this Kate Spade one) and my design was born.


This task asked me to calculate the production costs for making this bag, which I detailed here:

I then estimated the time spent on creating this piece, plus an hourly wage. Then, using those numbers I calculated a desired profit and a minimum cost to cover my materials + profit. Creating this bag took me about three hours, since I was designing as I went, tracking down materials, and making it on a trial and error basis. Based on a three hour production the minimum cost for this bag would be $34.31 which is more than I think anyone would be willing to pay for a handmade paper bag. However, I estimate that if the pattern were already set and the materials ready to go I could produce another in about 45 minutes time. Recalculated with a 45 min production time, the minimum cost comes out to $10.01 which I think is much more reasonable. If there were a market for handmade bags of paper, tin foil, and fabric I might even set the retail price a little higher, at say, $13.00. What do you think, would you buy this bag for $13.00?

Production Standards
This assignment had me trying on lots of garments and seeing what variety of sizes fit me. Depending on the brand, the best fit for me can be a S, M, or L and anywhere from a size 6 to a size 12. Of all the items I tried on today I found three mediums, one small, a size 8 and a 29 jean that fit me. I know I even own a few items in size XS in my closet and designer jeans in a range of at least four sizes. It is crazy to think that the sizing system is NOT universal, which would make shopping so much easier for the customer.
The second part of this project was to find one item that fit well and try on every single one of it in that same size to see if there was any variation within that size. Since the typical standard deviation for a mass produced garment is 1/2" it is only expected that all the size M's of one item will not fit exactly the same. I tried on this gold polka-dotted Michael Kors top in size M in all three that were in stock.

I did notice slight differences in each. The first one I tried on felt slightly tighter in the armpits than the other two. The second one had a noticeably uneven hemline across the front. The third was tight at the right sleeve's hem. It was interesting to notice that even with only three garments there were definite differences in fit. I think it is always a good idea to try on the same garment in multiples of the same size before buying to make sure you find one that fits you best.
Mockup
The third project was to create a mockup of my "signature bag" out of cardstock. This is the 3D mockup I created out of cardstock and tape. I am calling it the "CC Cross-body."

In an earlier assignment I went to the fabric store and chose a few fabrics that fit my "brand aesthetic" and put together a fabric card with all the details on these fabrics so it would be easy to know where they came from, how much was available and other important information for sourcing the fabrics when it comes to production. So then, using the cost per yard of these fabrics I chose at the fabric store, I calculated the production cost for the CC Cross-body using the mockup to measure the size and estimate the fasteners needed.

The entire surface area of the bag is 171" so I calculated the cost of each of the fabrics for that amount. I looked up the prices of the necessary hardware online with findings of: 39" chain $7.53; two D rings $0.10; magnetic clasp $1.29. I also added an hourly rate of $9/hour, and it took me one hour to create my mockup. Adding all that up, my total cost before adding the fabric cost is $17.92.
The first two fabrics I chose, the chevron and the grey, have the same price of $4.99/yard which comes out to $0.55 per bag adding up to a materials cost of $18.47 per bag. Then I added a 20% profit making the minimum retail price $22.15. I used the same methods for the other two fabrics as you can see in this table.

The reason that the pink fabric costs more per bag than the chevron despite costing less per yard, is that you will notice the length of the bolt for the pink fabric is only 21 inches, as opposed to 43 for the first two. I think the pricing for this bag seems very reasonable, but I wonder what it would cost to make it out of leather!
Up next I will be creating a sample of this bag using a handmade striped fabric!
Creating A Sample
So, the next step, is creating a sample of my "signature bag," the CC Cross-body, using a handmade striped fabric. I created stripes on a plain white fabric using skinny blue duct tape at a diagonal angle, giving a beachy blue and white feel. For this sample I pinned the fabric together with pins, but to actually create it it would need to be sewn. The fabric I had on hand to use for this project is not stiff enough to hold the shape of a bag, so I had to use some cardboard on the inside to give the bag structure. Ideally a thicker fabric or even leather would be used to create this bag. Here's what the sample looks like!

I estimated that the fabric I used cost about $2.00/yard and I used about 186" of material so the fabric cost per bag is about 10 cents. The 180" roll of mini duct tape cost $2.99 and I used about 114" of it, so the tape cost about $1.90 per bag. Then I borrowed a chain from another bag to finalize the sample. I found chain online for $7.53 for 39" which is about how much this bag would need. I also saw magnetic clasps online for $1.29 and D rings to attach the chain for $0.05 each. That brings the total materials cost of this sample to $10.92. Then, taking the cost of labor into account, it took me about 40 minutes to create the sample at a cost of $9/hour, that's $6.00, bringing the total cost of creating the bag to $16.92. Then we add in a 20% profit of $3.38 bringing the minimum retail price to $20.30.
Materials: 0.10 + 1.90 + 7.53 + 1.29 + 0.10 = 10.92
+ 6.00 labor cost = 16.92
x .2 (20% profit) = 3.38
16.92 + 3.38 = 20.30
I would like to think that if this bag were created out of a more durable fabric, say canvas or leather, that I could even bring in more than that and bump the retail price up to about $65.00! I think it actually came out to be a pretty cute sample bag, and a viable design. How much would you spend on a cute striped crossbody bag?
Editorial Style Photo
The latest project was to create an editorial-style photo using an iPhone camera to experiment with different filters and techniques. After searching Pinterest for inspiration and creating a mood board I decided to go with a playful monochromatic pink theme using my pink living room couch as the setting. Here are a few of my favorites from the shoot. I'm planning to do a post to share a few more, so check for that soon!


Audience
Part of this program is learning how to use your social media sites to represent your "personal brand" and help people like potential employers and collaborators know who you are and what kind of work you do. If you are trying to grow your audience, whether as a company or on your personal pages, it is important to know who your audience is. That is why I am analyzing who my audience is here on the blog. My audience comes mostly from the USA with occasional viewers in Europe and Australia. The four top sites that are leading readers to my blog at the moment are Google, Pinterest, Bloglovin' and other blogs where I often leave a comment with my link. The posts that get the best immediate traffic are ones that feature good, clear, professional quality photography in addition to a cute outfit. The posts that get the most traffic over time and the most re-visits, interestingly, are the posts about home decor, as well as any posts in collaboration with another brand. For this reason I am working on my photography skills and getting better photos whenever possible, as well as increasing collaborations with brands that compliment my aesthetic and style.

I created an account on Hootsuite as well to try to help with tracking my social media sites, but honestly it is difficult to tell much without paying for an upgraded version. The features I would be interested in knowing about my sites are not available on the free version! I think it will be useful though for scheduling posts ahead of time on platforms like Twitter and Instagram. I am interested to see how these stats change over time, hopefully increasing!
Retail Marketing
I am slowly but surely chugging away at getting this course finished! Today I tackled a few more assignments for the last course, including this one: go to a retail store and look at the layout and displays, then pick one display that appeals to you and explain why it works.
For this assignment I went to the kate spade home pop up store in Soho New York. The store layout is a circle of rooms through which the shopper has to pass, and each room was set up almost like a room in a house so as to give an idea of how the pieces would look in a home. Each of the displays was flanked by a shelf of the actual items you could buy. Some of the items for sale were stacked in such a way as to create a visual display in and of themselves. The displays were so detailed with fun touches to make it look like the space is actually lived in.

For example, in the display I chose to write about here, the table is decorated with a bouquet of flowers, a notebook with a pen laid just so as if someone had just been there writing, and even a tray of macarons and glasses filled with faux ice cubes and a straw to create the illusion that they are in use. Alongside these (all of which are for sale of course) are stacks of books for sale, and stacked cake plates so that we are still reminded that this is a store display. By stacking the books we get a reiteration of the color and the sense of abundance. In the background of the photo you can see the bed set up with kate spade sheets and layered with throw pillows, and all along the walls are shelves with the sheets and pillows you can pick up to buy. I like the way they juxtaposed the extremely realistic displays with shelves of actual products to buy so that you have a very clear idea of how these items look in a home, and they are right at your fingertips to pick up and purchase for yourself. I love how they made the display look real and lived in because it feels more authentic that way and shows that even if things get a little cluttered or aren't exactly in place that it can still look appealing--since nobody's home is perfectly picked up all the time anyway. Using pops of color and a themed polkadot print across the space help draw the eye and attract attention. It looks like an inviting space that I would want to live in, so it does indeed make me want to buy those products and recreate the space for myself.
Marketing Photography
WOW-- after completing this assignment and creating my portfolio, I have finally submitted my last assignment for this Fashion Industry Essentials class!
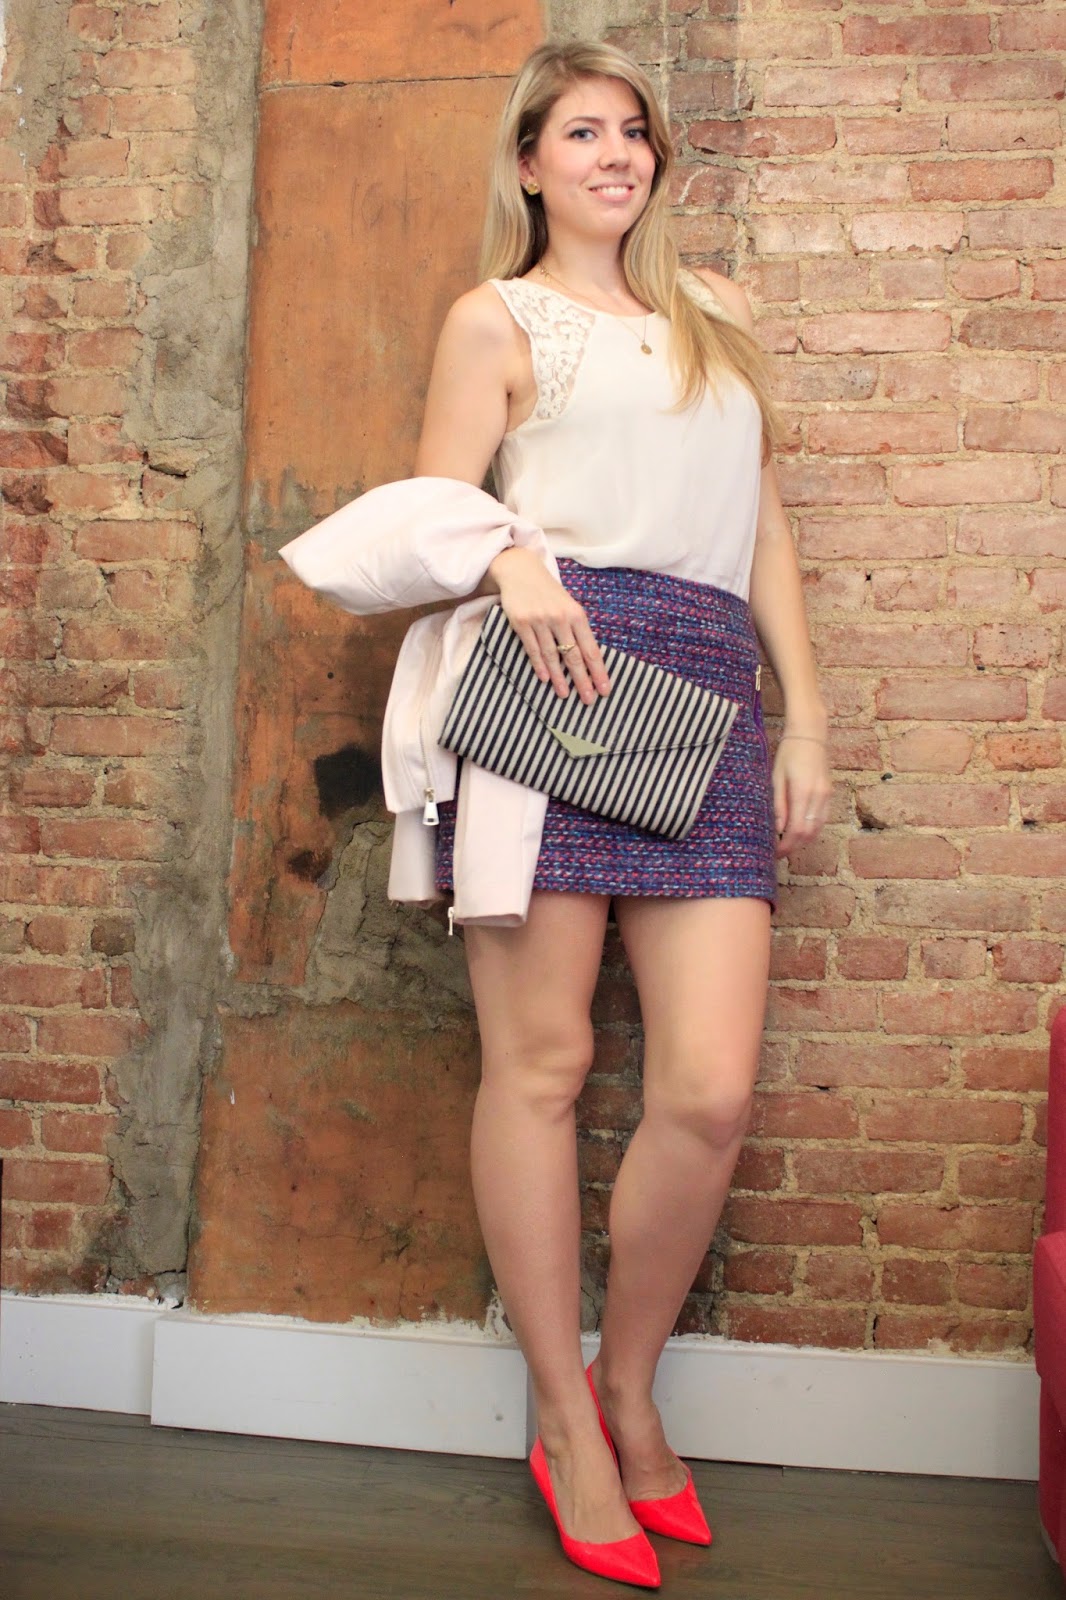
One of the last projects in the final course was to take marketing style photos--something like you would see in a catalogue. The images are meant to highlight the clothing or accessories that the model is wearing. For this project we were encouraged to try different techniques such as taking the photos from a low angle, dropping the horizon line behind the model, trying the rule of thirds, and experimenting with exposure on a smartphone. From this photo session, I chose the six best to share here. I couldn't find anyone to help me out with this project so I took the photos myself on my phone, making sure the camera and settings were how I wanted them, and then running to get in the picture!


In these photos I used the rule of thirds, and tried setting the exposure to different focal points, by tapping my phone screen to bring the focus towards the brick, floor, or wall for a different lighting effect. You can tell, for example, that the photo on the bottom left the exposure was set to the shiny silver floor, whereas the photo on the top right had the exposure set to the yellow wall.


interesting to read. I certainly have items in the same size from the same manufacturer that fit rather differently. Makes buying on-line more of a gamble...
ReplyDelete